Friday, December 6, 2013

Nutty as a Fruit Cake

Fruit cake featured heavily in the Christmas lineup when I was growing up and I distinctly remember that my mum's was the best. She would make this huge pot of fruit (well it seemed huge) on the stove and then it would miraculously turn in to a cake. I used to love eating the boiled fruit and butter mixture from the pot before the flour and eggs were added. It was a miracle any was left for the cake. So some years ago I asked her for the recipe and her answer... "Its the one off the fruit box but I added a bunch of other stuff." Naturally I wanted to know what other stuff which was met with vague replies of more fruit and some nuts and "then I pour booze all over it. Its in the book". "The book" is a raggety old book mum started way back in the 70's which is filled with recipes from all over the place.  What I have discovered is that the recipe really didn't matter. I doubled the fruit and added some extra peel and nuts then like a dutiful daughter poured booze all over it. The result was delicious. I have been making a full size cakes and struggle to finish them (there is still a piece in the fridge from last year) so this time I decided to make mini cakes. Not cupcakes but quarter sized perfect little fruit cakes. These will be gifts for the support staff at my daughter's school. I think they will be a hit. Well I hope they will because those ladies run that place.

My recipe went as follows:
4 cups of mixed dried fruit (in Australia you can buy this in a packet)
1 cup of mixed peel
1/2 cup of walnuts
1/2 cup of whole almonds
1cup of brown sugar
5 oz of butter
1 tsp baking soda
Put above in a large pan with 1 cup of water and bring to a boil. Simmer for a few mins then cool.

1/2 cup of plain flour
1 1/2 cups self raising flour
2 eggs
Add the rest of the ingredients and mix.

Bake at 175ºC or 350ºF for 1.5 hours for a large cake or 35-40 mins for a small cake. The small cake I made was about 10 cm across. For a large cake you will need a 22 cm tin.


The "original" recipe.


Thursday, December 5, 2013

Elf Time 2013


Our elf arrived the other day through a beautiful elf door (AKA Little Fairy Door) and the kids are so excited. The door arrived a few days ahead of our elf Adam and the anticipation was... well lets just say they were excited.
Now its time for me to have some fun (sorry about the picture quality my new phone is on its way). I will be adding to this over the weeks so keep stopping by.
The lovely Adam and his magical door.
Riding a rocket


Poker with the ladies

Magical elf messages (This one was a huge hit)


Riding a tiny rickshaw.


Saturday, March 2, 2013

Microwave popcorn

I have always hated microwave popcorn. The smell, the taste, the weird chemicals but it always seemed so convenient. I never buy it because it is so easy to pop on the stove but then there is the pot to clean. In light of this I decided to try a method I had heard about years ago but never used. Its so easy I can't believe I didn't do it sooner. I am sure it depends on your microwave but for us it takes 90 seconds. Heres what to do.
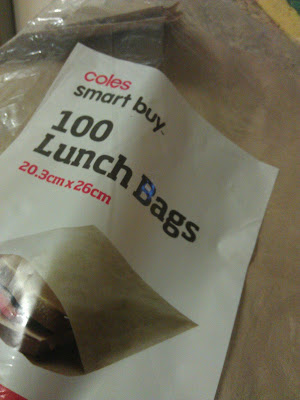
Brown paper bag
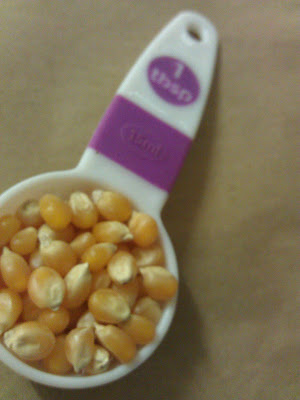
2-3 tbs popcorn
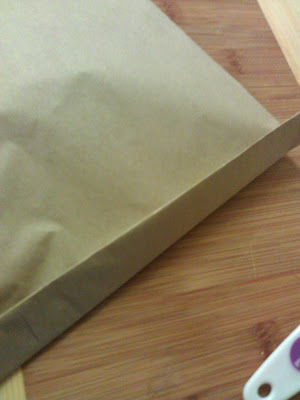
Fold down the top of the bag 2 times and microwave on high for 90 seconds. Your microwave might be different from mine so you will have to experiment a little. If I do 3 tbls then we do an extra 10 seconds.

Tadaaa Super quick popcorn. No chemicals.

Then just add what ever you like on your popcorn.  I am looking for organic or recycled bags for an even better chemical free experience but these seem fine. 

Tuesday, February 12, 2013

Rainy day (or in our case too hot to play outside day)

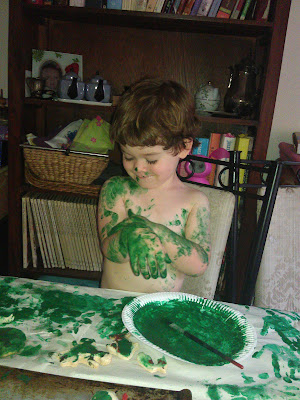
Salt dough has been a revelation. Until a few weeks ago I had no idea it existed. I have made other non-edible dough but never have I seen 2 people have more fun than my kids and this dough. There is no "cooking" except the 20 mins in the oven and you most likely have everything around the house for this one. Salt, flour, oil, water. It can be that simple but then we decided to paint them. We used poster paint mixed with PVA or craft glue (Elmers) but I would recommend using acrylic paint if you have it. The glue makes it nice and shiny so I would still mix it in to the paint. If your kids are big paint wasters (yep) then maybe just stick with poster paint. Its way cheaper. This was a great activity for us because Poppy, being 7, is a little more advanced artistically than Asher who considers all activities in this world a type of smashing game. But they both had fun and can do it to their own skill level. I gave them a huge pile of kitchen gadgets like the garlic crusher, forks, paper clips, erasers, plastic bottles and lids, cookie cutters, anything you can use to make a pattern is fun. 
**I can not stress enough that this is a non toxic dough but it is in no way edible! YUCK.**

You will need 
a big bowl
the recipe
cookie/play dough cutters
kitchen/play dough gadgets
rolling pins 
a baking tray
paint
PVA glue
and a big pile of news paper


Rolled out and ready for the oven


Just out of the oven

Aren't we supposed to be painting the dough?


Some of the finished projects
Recipe
300g(10 oz) plain flour
200ml(1/3 pint) water
300g (10 oz) table salt
2 tsp oil
mix and squish until a dough forms
(adapted from the Rainy Day Book by Jane Bull)

You can play with this the way it is or shape it and bake it for 20 mins at 180º/350º. Some pieces may take less or more time depending on size and thickness.

This dough will last a couple of weeks in a air tight container. It does get softer as the salt absorbs moisture but we just added more flour.

Don't use kosher or flake salt for this or the dough will be to rough for little hands.

Monday, February 11, 2013

Pancake Perfection


I must preface this by saying that these are pancakes not crepes. Pancakes! The fluffy sweet pillowy type you get at real old school pancake restaurants. So for those Aussie readers out there who masquerade crepes with lemon and sugar as pancakes this is not the recipe for you. You can however use this recipe for pikelets. I will at a future date post an amazing recipe for crepes but not today. These are our Dinner Cup pancakes and the recipe is fool proof and easy. Almost always served with blueberry sauce and often with crispy bacon. You will, I hope, notice a pattern which makes it easy to remember.


Perfect Pancakes

2 cups Self-raising flour
2 cups milk
Time to flip...
2 large eggs
2 tbls melted butter (cooled)
2 tsp sugar (optional)
2 tsp vanilla
a generous pinch of salt

Mix all ingredients together in a large bowl. Let sit for 20-30 mins.
Heat a large non stick pan on medium heat. Spray once very sparingly with non stick spray. Pour 1/3 cup of batter in to pan and cook until big bubbles form all over the pancake then flip. I never re-spray and if you have a good non stick pan you should not need to*. Serve immediately with butter and maple syrup or my quick blueberry sauce. 


Quick BlueberrySauce

In a medium glass bowl add
1 cup frozen blueberries
2 tsp sugar
1/4 teaspoon of corn starch (optional)
1 tbls butter (optional)

Put the blueberries, sugar, and corn flour in a microwave safe bowl.
Cover
Microwave on high for 2-3 mins depending on your microwave. You want it to boil and bubble for about 30 seconds. Let cool for 5 mins and it will thicken slightly. Stir in the butter. I say optional for the corn flour and butter because some frozen blue berries are more mushy than others and the butter because some folks just don't do butter. The butter does give a glossy sheen to the sauce.
Serve over pancakes.
Incidentally this sauce is delicious served warm over ice cream and anything else you can think of. 

Tip:
*If you follow this method you will get perfect pancake house pancakes. When you add oil it makes patterns on the surface of the pancake and they are not as tender. 


The happy diners.

Sunday, January 20, 2013

Poppy's Lorax Party

My daughter turned 7 last week and after much conversation we decided on a pizza and movie party with optional sleepover. The next question was which movie. I knew I needed a movie so I could figure out the theme of the cake and food. I was so happy when she decided on the Lorax. There was just so much colour and fun things to work with. So off we went and found some fun stuff for invitations. 


Then I searched the internet for ideas. I immediately found a beautiful cake that I knew I wanted to make... Pinterest of course. And a few other Pinterest finds. All in all it was a wonderful party and the girls had a fantastic time. 


I love how the cake turned out. The cotton candy/fairy floss didn't last long. It was a very hot day. 


I found these on pinterest. They were very popular with the girls and super easy to make. Just a marshmallow dipped in white chocolate and rolled in sprinkles. 

Poppy cookies for my Poppy. This is just a simple sugar cookie with lemon icing. 

Cucumber truffula trees

I found a mustache template by googling "Lorax Mustache" and then cut it out with an exacto knife. We used these on the straws and on popcorn bags and also on the goody bags.


These cake pops later became the candle holders. I was worried the fairy floss would catch fire so I decided to put the candles around the edge of the cake. 
The cake pops were a little fiddly but basically they were plain cake pops dipped in white chocolate. I was lucky enough to find these cool straws at the dollar store. I used the same mustache template just shrunk down. I then placed parchment over the template and piped white chocolate with yellow food colouring. The eyes were dots of white chocolate and I drew the pupils with a food writer pen. I just "glued everything in place with melted white chocolate.


I made the "save the trees" banner with cardboard triangles and letters I printed from a word document. I think the font was Baskerville 300pt. I punched holes and threaded it on string. And the tissue paper pompoms (I thought they looked like the tops of truffula trees) are dollar store finds. 

These goodie bags were just orange paper bags I found in the party store. I used a Lorax pumpkin carving template and just printed it the size I wanted on yellow paper. We added googly eyes for fun.

We decided to do a quick take home craft so I found these paper pots and put together this little poem from Lorax quotes and printed it to attach to the pots. The girls planted pompom marigolds and zinnias.

This is the aftermath of hours in the baby pool, planting seeds, pass the parcel, pizza making, dancing, a movie, popcorn, milk shakes, slushies and cake. These kids were wrecked.
All in all this was a great party. The next morning we had fruit and crepes with nutella. Out of 10 girls 5 slept over. Everyone was picked up on time and we were exhausted. What an experience. I think maybe we will leave the sleepovers until they are a little older but we are very lucky that these are all wonderful kids. 

Monday, January 7, 2013

Asian Meatballs

These are in the Dinner Cup and even before the dinner cup they are a family favourite. So much so I even served them to my somewhat finicky extended family for my son's 2nd birthday. I have adapted this from a recipe I found in a magazine called Family Fun its a great magazine and has a really easy website with lots of ideas for crafts and recipes.

My take on it


Meatballs:

1 pound ground chicken or pork
2 green/spring onions you can also use a small white onion
1/2 cup cilantro/coriander leaves or a mixture of cilantro, mint and basil. Whatever you have on hand.
1 generous tablespoon ginger
1 tablespoon sesame oil
1 tablespoon vegetable oil
2 tablespoons soy sauce
1/2 cup fine, dry bread crumbs (unseasoned) I usually use wholewheat
1 egg, lightly beaten

Sweet Soy Dipping Sauce:

1/2 cup brown sugar
1/2 cup soy sauce
2 tablespoon rice vinegar
2 or 5 slices fresh ginger 


Directions


To make the meatballs: Heat the oven to 400º F/200º C
Add the herbs and onion to a mini food processor and process them until it is very finely chopped.
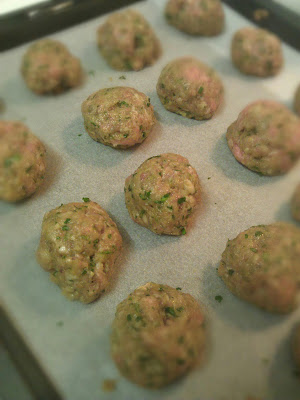
Gently mix together all ingredients (hands are best for this), then form meatballs. I use a small ice cream scoop. But you can use a spoon and then gently roll in your hands. Wet hands will stop the meat from sticking to your hands.
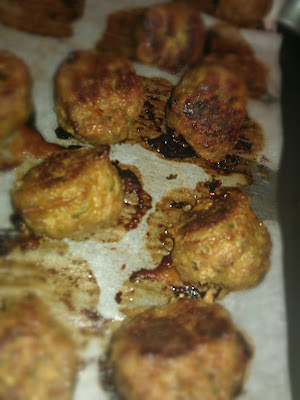
Arrange on a parchment lined cookie sheet and bake for 20-25 minutes, until well-browned and cooked through.
To make the dipping sauce: In a small pot, stir all the ingredients together over medium-low heat until the sugar dissolves.
Simmer for about 3 minutes, stirring frequently, until the sauce thickens a bit.
Remove the ginger. Serve in a little dish (to avoid double dipping each person gets their own)
If we are having just meatballs we usually have rice or chow mein on the side and always a vegetable stir fry.
I also put these in a coconut soup (recipe to follow). They are great hot or cold and taste like the filling in a pot sticker.